Tuesday, November 11, 2014

New Synology DSM update!

Normally I don't post on software updates, however there seems to be a very useful DSM update coming in. Especially given all the security issues Synology has been under fire lately.

Especially interesting is the security center, that helps you see any issues you might have,  2-step verification and the apparmor / revised package center to ensure your Synology is safe.

Given that some might have more (or less) sensitive info, this seems to be a good step in a safe direction! Doesn't guarantee 100% everything will be unhackable, but should help!

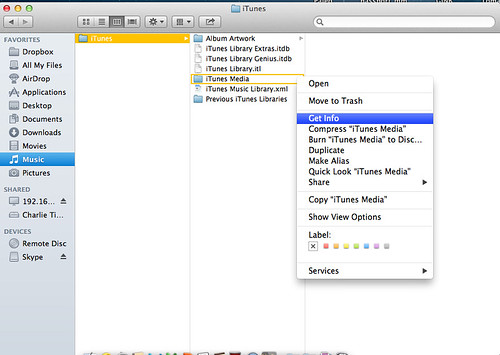
I'll post some updates on how to set-up and use the new Security advisor, the duplication part of Amazon glacier, etc....

Info below:
https://www.synology.com/en-global/releaseNote/DS212j

Version : 5.1-5004

(2014/11/06)

Compatibility and Installation

  1. DSM 5.1 can only be installed on Synology products running DSM 5.0. Before starting, please log in to DSM and go to Control Panel > Update & Restore > DSM Update to install the latest DSM.
  2. Some features have specific hardware requirements and therefore are only available on certain Synology NAS products.
  3. Weather information in the DSM login page and CIFS Scale-Out Cluster will neither be available nor supported in DSM 5.1.

What's New in DSM 5.1

  1. Security Advisor
    • Security Advisor is a DSM security application that scans your DSM settings and Synology NAS and recommends changes that help keep your Synology NAS safe.
  2. AppArmor
    • Application Armor kernel security module is now enabled in DSM. Each system program is associated with a security profile that restricts certain functions, protecting against unknown threats from malicious software.
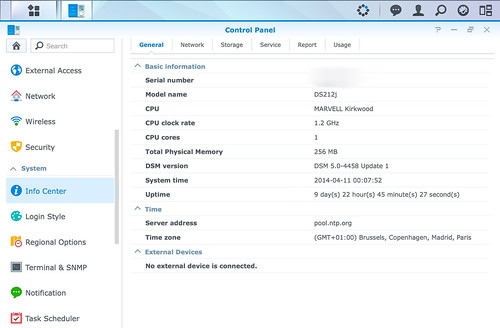
  3. Service by Interface
    • You can set the network interface that each service will use in Control Panel > Info Center > Service.
  4. App Privileges
    • You can assign application privileges for local and domain groups.
    • You can define application privileges according to IP address.
  5. DSM Auto Update
    • You can create a schedule to install DSM updates automatically to keep your Synology NAS up-to-date.
  6. Package Center
    • Trust level protects you from installing altered packages or packages from unknown sources on your Synology NAS.
  7. 2-step verification enforcement
    • 2-step verification can be enforced on admin groups or all users.
  8. Backup and Replication
    • You can now back up data from any Synology NAS (A) to a volume on another Synology NAS (B) using its non-admin account (on B) with network backup destination privileges.
    • Added backup destination support for Azure, SFR S3, and hicloud S3.
    • The following packages can now be backed up via the built-in Backup & Replication feature: VPN Server, DNS Server, Mail Server, Proxy Server, RADIUS Server, Directory Server, and Asterisk.
  9. LUN Backup
    • iSCSI LUN network backup performance has been enhanced by 169%, as illustrated in the below comparison:
    LUN BackupDSM 5.0DSM 5.1Improvement
    Local Backup445 MB/s863 MB/s94%
    Network Backup129 MB/s348 MB/s169%
  10. iSCSI LUN Snapshots
    • You can set a schedule for creating iSCSI LUN application-consistent snapshots to continuously protect your LUN.
    • You can lock a specific snapshot to prevent it from being removed by retention policy.
  11. iSCSI LUN Allocation Unit Size
    • You can configure the iSCSI LUN using advanced features to optimize the performance.
  12. VMware VAAI NAS
    • Added NFS support for two primitives: Full File Clone and Reserve Space.
    • Please note that you should install the Synology NFS Plug-in for VMware VAAI and read the instructions in README.txt to make sure installation is successful.
  13. UNMAP Support for Windows Server 2012
    • Added support for Storage Space Reclamation via UNMAP command, which can be triggered by file deletion or a file system level trim.
  14. SSD Cache
    • You can now create a read-only cache with one SSD.
    • SSD read hit rate is displayed in real-time as well as daily, weekly, and monthly intervals.
    • SSD Cache Advisor helps you determine the required SSD cache size.
  15. High Availability Manager
    • Added Read/Write SSD Cache support for HA cluster.
    • High Availability is now built-in for DSM 5.1.
  16. File Station
    • You can manage and transfer files to another WebDAV/FTP server.
    • Added support for FTP, SFTP, WebDAV, and WebDAV over HTTPS.
    • You can share files as attachments using a simple email client.
    • You can use the smart drag and drop feature to apply different actions to each copy or move file conflict.
    • You can share files to DSM users and they will receive notifications.
    • You can now play music using the built-in audio player.
  17. IPv6
    • Added IPv6 support for VPN client, Log Center, QuickConnect and DDNS.
  18. Static Route and Multiple Gateways
    • You can set the default gateway on each network interface.
    • You can define static routes based on your network environment.
    • You can use the IP Routing Table to view how network packets will be routed.
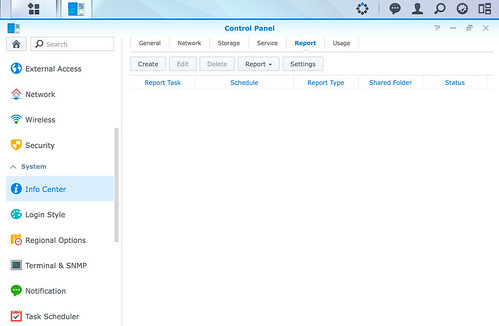
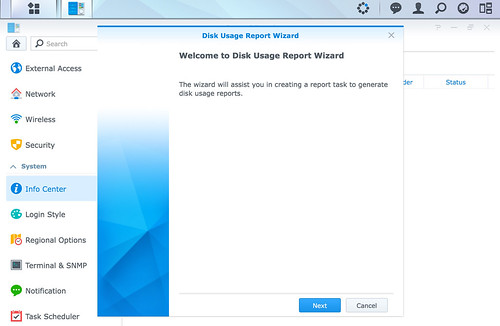
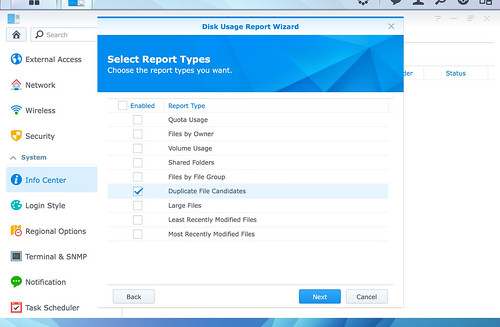
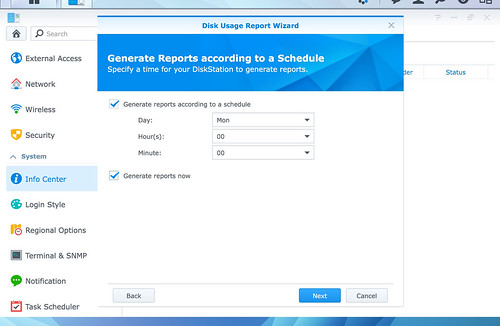
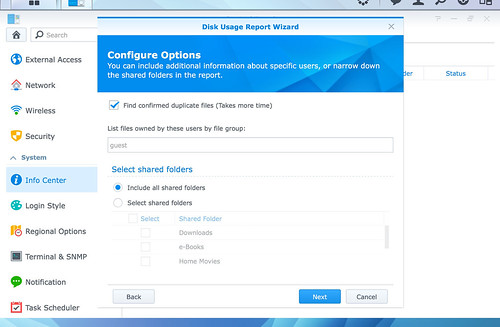
  19. Storage Analyzer
    • Storage Analyzer allows you to quickly view overall usage trends of your Synology NAS, create and manage tasks to analyze storage spaces, and generate detailed reports on volume usage.
    • You can select report types, create a schedule to generate periodic storage reports, and easily view previous reports that match the specified time or criteria.
  20. Storage Manager (for RS10613xs+, RS3413xs+, RS3614xs, RS3614RPxs, RS3614xs+ only)
    • You can now create volumes up to 200 TB large.
    • You can create RAID groups and RAID arrays. A RAID group for Multiple Volumes or iSCSI LUNs (Block-Level) that use RAID 5 or RAID 6 may contain multiple RAID arrays.
    • Synology Hybrid RAID is no longer supported.
  21. Log Center
    • Added IPv6 support for log sending and receiving.
    • Added supports for customized log formats.
  22. MyDS Center
    • Added a wizard to consolidate multiple MyDS accounts into one account for easy management and convenience. If you have multiple MyDS accounts, complete this wizard so you can continue enjoying our MyDS Center services.
    • You can easily monitor MyDS related services (DDNS/QuickConnect) at a glance.
    • You can modify account information and subscriptions directly in DSM.
  23. Text Editor
    • You can now use hotkeys to quickly perform common actions.
    • You can convert between Traditional and Simplified Chinese text.
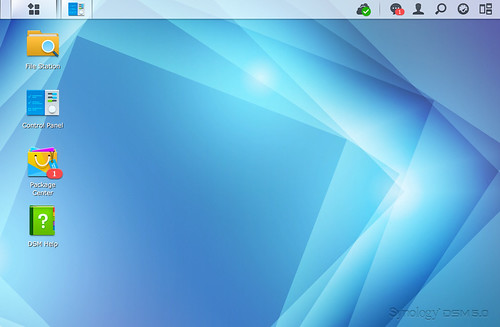
  24. DSM Desktop
    • Push notifications can now be sent via Chrome and Safari.
    • You can change the main menu style to drop-down.
    • You can adjust the size of Desktop icons to be smaller.
  25. Misc
    • You can set global firewall rules for all network interfaces.
    • You can set default permissions for external drives.
    • You can define each FTP user’s root folder to be a folder other than their home folder.
    • You can filter Domain Users and Groups by Organizational Unit.
    • A command-line-based FTP client is built-in for automated tasks.
    • You can now customize the SSH port.
    • Python core is now built-in.

What's New in Packages

  1. Note Station
    • Note Station helps you fully enjoy writing, viewing, managing, and sharing content-rich notes. It is very easy to create content with rich text editing, media embedding, attachments, and much more. Manage your notes by using tags and grouping notes into Notebooks. You can also import your notebooks and notes from Evernote to centralize all your notes in one convenient place. When you are ready, Note Station makes sharing your content via social networking platforms simple and quick. Create, share, and enjoy!
  2. Cloud Station
    • You can sync data according to Unix or Windows ACL privileges.
    • Added support for syncing encrypted shared folders.
    • Administrators can control the file type and file size specific users can sync.
    • Offers in-app log.
    • You can disable versioning to reduce storage consumption.
    • Cloud Station Client offers MSI, DEB, and RPM installers for Windows and Linux computers.
    • Cloud Station Client for Mac now supports retina icons.
    • Cloud Station Client for DiskStation can now selectively sync data.
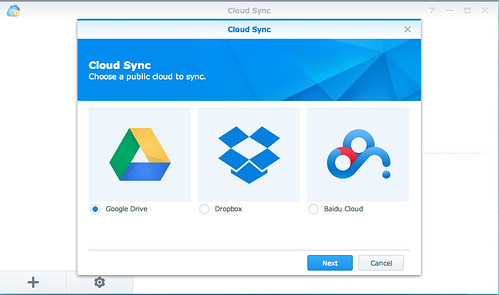
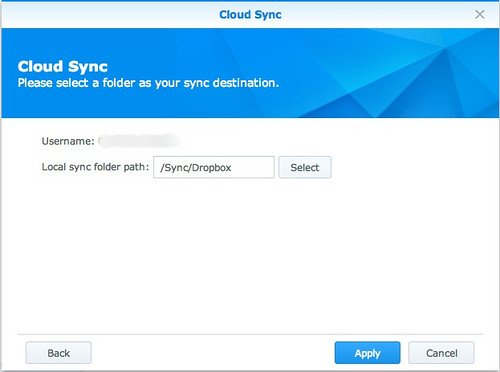
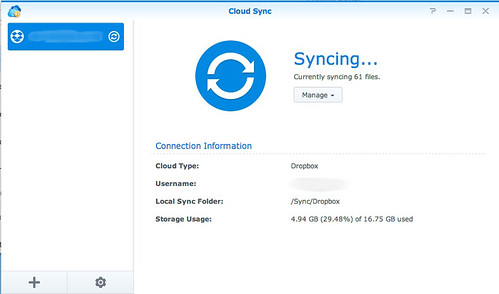
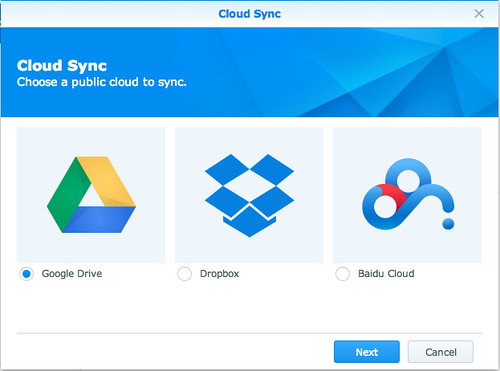
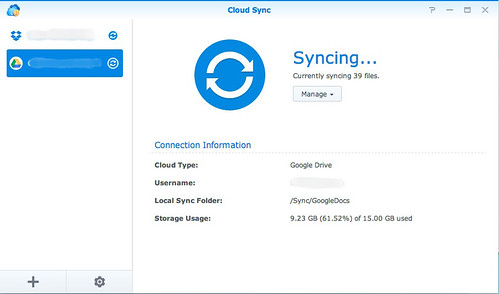
  3. Cloud Sync
    • Added support for Microsoft OneDrive, Box, and hubiC.
    • You can selectively sync folders.
    • You can filter specific file types, file sizes, and files.
    • Offers bandwidth control.
    • Offers syncing history.
  4. Proxy Server
    • Proxy Server provides caching and access control for HTTP-based services. With caching, you can reserve caching storage space on your Synology NAS to store HTTP-based content from the web. You can also use Proxy Server to deny users from accessing restricted web services, keeping your network safe and productive.
  5. VPN Server
    • Added IPv6 support for OpenVPN (Requires DSM 5.1).
  6. Glacier Backup
    • You can restore data at the file-level instead of whole archives through the new Explore feature.
    • You can now remove a specific file or folder from Amazon Glacier.
    • Added support for file-deduplication within the same backup task, saving your Amazon storage space tremendously.
  7. Video Station
    • You can use the new home page to view recently added, released, and watched videos at a glance.
    • In the homepage of TV Recording, streaming online programs and setting recording tasks is now easier and quicker.
    • You can use the real-time filter to find your favorite videos quickly, and save the result as a smart collection.
    • You can view the display in three different modes – Poster, Tile, and List View.
    • You can use the “Watched” status on each video to keep track of videos you have already watched.
    • Retrieve online subtitles when starting to play a movie.
    • You can share a video collection via a sharing link, allowing anyone with the link to play the videos without having a DSM account. The page is optimized for display on desktop and mobile browsers.
    • Video information can be saved as files for data backup.
  8. Audio Station
    • You can rate songs in your library and categorize music by rating.
    • You can import rating information from iTunes.
    • Search results will be displayed according to artist, album, and song title.
    • You can share your favorite playlist via a sharing link that is optimized for display on computer and mobile browsers.
    • Added gapless playback support for web streaming (original files only, not including transcoded stream).
    • Added supports for DSD format playback (select models only).
    • Added support for multiple Bluetooth speakers playback.
    • You can individually adjust the volume of multiple players.
  9. Photo Station
    • The timeline mode now displays more photos.
    • Various transition effects are offered in Slideshow.
    • You can set your favorite music to play in the background during a slideshow.
    • You can share photos in a virtual collection that is optimized for display on computer and mobile browsers.
    • Added support for sorting photos from oldest to latest in Timeline view.
  10. Download Station
    • Redesigned visual style.
    • Added file hosting support for mega.co.nz.
    • You can save up to five different BitTorrent search results.
  11. Mail Server
    • Mail Server can scan messages for potentially dangerous content.
    • You can send daily reports about the status of Mail Server. The report will include summaries of hourly traffic, delivered/received messages, deferred/rejected messages, SMTP delivery failures, warnings, and the quantity of senders and recipients.
    • Added support for intermediate certificates.
    • Added advanced anti-spam settings and spam client connection rejection.
    • Added daily sending quota to limit each user's outbound mails.
    • Added mail server settings check to analyze potential weaknesses.
    • Added support for app privilege.
  12. PACS
    • PACS is a clinical data management application that can be used to store, access, transfer, and manage medical images and digital reports in DICOM format.
  13. Ruby
    • Ruby is an object-oriented open source programming language with a focus on productivity and simplicity.
  14. Node.js
    • Node.js is a platform built on Chrome’s JavaScript runtime and is becoming widely popular for developers to build fast and scalable network applications.
  15. Python Module
    • Python Module package now provides supplemental extensions for Python 2.7.
  16. iTunes Server
    • Album covers are now displayed.

Caveats & Limitations

  1. Data Replicator has reached the end of its life span. You are encouraged to use Cloud Station to back up data on your PC or mobile device.

Sunday, July 13, 2014

Free space by sending your iTunes media to your Synology!

I don't like having my iTunes library on my Mac. Main reason is that it occupies a LOT of space. Besides all the music you have downloaded and it's artworks, which can already be several GBs, iTunes also backs up to your Mac all IOS apps you downloaded. Even if you delete them on your iPad or iPhone , they stay on your Mac - depending on how many apps you have and the size of them, this can be huge.

Don't believe me? If you have default Itunes settings, On your Mac go to Music -> iTunes. Under the subfolders iTunes Media right click ( or option click ) and choose "Get info". Check the window that appears for the size of this folder. Do the same for "Album Artwork".

Charlietechlife.blogspot.com
Free space by sending your iTunes library to your Synology!

On my computer, Album artworks occupy 234Mbs, and iTunes media a whopping 18.9GBs!!!

Charlietechlife.blogspot.com
Free space by sending your iTunes library to your Synology!
Charlietechlife.blogspot.com
Free space by sending your iTunes library to your Synology!


I don't need all these things on my Mac - IOS apps are useless to keep there, and even music will be heard on my iPhone, so why keep it on the Mac? And with the latest MacBook Air and MacBook Pro using SSD there isn't a lot of spare space.

iTunes has no setting that allows you to specify where to keep specific music or app files. There is just one setting to send all iTunes library. And the incorporated Synology "iTunes server" package created a shared media server, not what I need.

So I decided to find a smart way to get space back by sending apps and music to the Synology.

!This solution will only work if you sync / use iTunes on the same network that you have your Synology!

The basic idea is that you create a alias the points from the iTunes media folder on your Mac, to a folder on your Synology. ITunes will still think it is accessing "iTunes media" on the local computer, but in reality it is accessing the Synology folder!

1) Create a shared folder on the Synology. For this example I created one called iTunesSynology, but it can have any name.

2) Ensure iTunes is closed on the computer and you don't launch it accidentally ( I.e. Via plugging in an iPhone or ipad ).

3) Ensure you are connected via some file sharing protocol to your Synology and to the "iTunesSynology" shared folder I use SMB, out you can also use AFP. To connect to the shared drive:

Finder -> Go -> Connect to server

Charlietechlife.blogspot.com
Free space by sending your iTunes library to your Synology!

After you need to put in the Synology IP, password and login:

Charlietechlife.blogspot.com
Free space by sending your iTunes library to your Synology!

In Finder, go to the shared tab and open iTunesSynology folder under the Synology server.

For this to work, every time you use iTunes you need to ensure you are connected to the Synology "iTunes" shared folder via the step above.

4) Move the "iTunes Media" and "Album Artwork" folders from under the Mac ->Music -> iTunes folder to the "ITunesSynology" folder on the Synology

Charlietechlife.blogspot.com
Free space by sending your iTunes library to your Synology!

5) When the file transfer has finished, while pressing Command and Option (Alt) key on the keyboard, drag the "iTunes Media" folder back to the iTunes folder on the Mac. If you are doing it right, the folder icon should have an arrow on it while you drag, and in the end should look like this ( note the arrow on top of the folder icon of iTunes media on the Mac ):

Charlietechlife.blogspot.com
Free space by sending your iTunes library to your Synology!

6) Launch iTunes! Test a couple of songs, it should work perfectly!!! Just make sure before iTunes opens that you are connected to your Synology.

Congratulations, you just released quite a couple of GBs off your Mac!


Monday, May 12, 2014

MACOS & Synology tip: How to connect to a shared drive automatically on logon

I have a synology NAS mounted in my home network. Everytime I boot up my MacBook Pro I have to connect to the shared drives in the synology via the finder:

finder -> Go -> Connect to server


After you need to put the Synology IP, password and login.

Each time you boot your computer you need to do this. Now wouldn´t it be great if this was automatic? It can be! How to set it up:

Step #1: Connect to your shared drive via Finder following the steps above

Step #2: Add to your logon

- Open system preferences -> Users & Groups


Go to Login items

Press the + sign beneath the list of login items.

Navigate to the shared folder of the Synology. Any if the shared folders will work to automatically add the Synology on login.

It will now appear in the list of login items. If you are not on a local LAN it will display an error message of not being able to connect.

Check hide if you don.'to want a finder window to open. Close and voila!


Wednesday, April 23, 2014

Sync Synology with Dropbox and Google Drive

With DSM 5.0 Synology introduced a feature a lot of people have been asking for - the possibility to sync or use your Synology with Dropbox or Google Drive.

What a cool way to:

1) transfer files from whatever to your Synology! Dropbox or Google Drive is compatible with almost every platform out there, be it Mac, Windows, IPhone, iPad, Android or Windows phone. As soon as you upload for example a picture from your iPhone to Dropbox, it will automatically be synced to your Synology.

2) Share! If you have a shared folder in Dropbox, by adding a file to that folder on your Synology, you are sending it to people you have that particular folder shared with.

3) Cloud Backup! Google has taken a decision in March 2014 to slash prices of google drive. I currently use Amazon Glacier on my Synology to backup a lot of information - mostly Pictures and videos. As per my blog post on why I bought the Synology it had an automatic upload system to Glacier and my monthly cost for an online backup of a lot of information (TBs) is only around 5$.

However Amazin Glacier has disadvantages. It had no dedicated program to upload / download info. Files are stores without filenames, so the program you use needs to solve this. And finally it is sloooowwww. A request to take something out of Glacier takes approx 4 hours to start the download, and is extremely slow to send. Good for cheap backup of files you do not need in a rush or to modify often, but not for much more.

So, back to google drive. With the price slash, google is turning storage into a commodity. For a whopping 1TB of info, google charges only 9.99$ per month! If you need less, 100Gb for only 1.99USD And we all know the advantages of google drive - it's fast, secure, files are just there, it even keeps previous copies.


Any limitations?

I only saw:

1) you can only synchronize your complete Dropbox or Google Drive folder. You can't select a set of subfolders. It's either everything or nothing!

2) for the Mac you might be wasting Synology space with multiple backups. If you use Time Machine on your Mac with Synology with your backup disk and you have Dropbox installed it is backing up th 2-10Gbs of info via time capsule to the Synology and if you install this sync it repeats the info again. The solution? Tell Time Capsule to exclude the Dropbox folder from the backup.


How to install?

You need:

- A Synology installed with DSM 5 and internet access. If unsure on what version you have, It should show on the bottom left DSM 5.0 on the main window.

- Basic knowledge around the Synology interface

- A Google Drive or Dropbox account


With the above checked, let's start!

1) Log in to your Synology and head over to the package center.

2) In the upper right corner of the package center is a search box. Search for Cloud.

3) 3 options should appear - Cloud station, Cloud Station Client ( both for making your personal cloud) and Cloud Sync. Press Cloud Sync for more information ( as image below ) or directly press install.

4) After installing when you enter the base menu a new option appears called Cloud Sync. Open the application.

Synology DSM 5.0 main menu

5) When you enter the program for the first time, it will automatically open up the connection wizard. Select the service you want to configure. We will start with Dropbox. Select it and press next.

Synology Cloud Sync Wizard

6) a pop-up window will appear asking you to allow cloud sync to access your Dropbox. If you are not already logged onto Dropbox in your browser, you will need to login before the allow screen appears.

Synology Cloud Sync
7) The pop-up will disappear, and the wizard will continue. The next step is to select where you want the Dropbox folder synced. Remember it will be the whole Dropbox, including every subfolders and file. On my Synology I created a separate shared folder just for this with it's own permissions.
Synology Cloud Sync
Synology Cloud Sync wizard folder

7) After pressing Apply, the app will start syncing automatically. Anything changed in your Dropbox will mirror in the folder you selected, like any other Dropbox app. Anything you change in the Synology Dropbox folder will change everywhere else as well.

Synology Cloud Sync Main Window

In the top corner of your Synology main page a cloud icon will appear. It will reflect the status of your sync. A green tick is synced, a blue sync in progress. Depending how many files you have it will take more or less time for the first sync.


Synology main screen with iCloud sync

And Google Drive? Can I have both at the same time?

Yes, both can be installed. The process is exactly the same.

1) Open Cloud Sync. Press the + button on the bottom left to start the wizard.

Synology cloud sync main window

2) Select Google Drive on the first wizard screen and press next

Synology Cloud Sync wizard

3) A pop-up will appear to validate the access with Google. Press accept. If you are not logged into google on the browser, a login screen will appear first.

Synology google accept

4) select the folder where you want to Sync. Press apply and...

5) The sync will start!

Synology cloud sync main window

Wait until both accounts turn green. All files have been downloaded both for Dropbox and Google drive.


As a personal backup options for your files, I would recommend google drive given the 1Tb pricing being so cheap. For sharing and having folders synced with friends / family, Dropbox still wins for me.


Enjoy!


Friday, April 18, 2014

Compress HD video for free from 10Gb to 1GB on a Mac

After using my automatic duplicate and big file finder on my Synology (see CharlieTechLife blog to set-up) I saw that I had several HD videos weighing a whopping 12 to 15Gb in .ts format. This means over 100GBs in vĂ­deos I see maybe once per year.
So I started investigating how I could compress those videos into a more reasonable size. My objective is to have each file reduced to approx. 1Gb with minimal quality loss and be compatible with playback on PS3, IOS devices, Windows, etc..., so I need a compression codec (divx, xvid, x264) and a container (.avi, .divx, .mkv) compatible with these devices.
On the Mac there are two software programs that are FREE that allow you to do just this. One is Handbrake, a free video transcoder that works extremely well. The second is Mediacalc, a bitrate calculator - it's there to ensure your video ends up being the right size.
After you download them following the links above, let's get started!
Fire up Handbrake. The interface is pretty straightforward.
Handbrake interface
Press source and select the video you want to compress. Under title you will see details of the video. Before our next step jot down the duration ( in my example it's.00:41:57). We will use this in a minute to ensure the compressed file is 1Gb.
As my Output setting options:
- Format: MP4 file. The mp4 format is playable across most platforms I need (iPad, IPhone, PS3, Xbox...)
- Large file size: uncheck. This is to enable 64bit - it allows files bigger than 4Gb for nonFAT32 systems. Will not affect any compression beneath this size, and if checked can limit compatibility
- Web Optimized: Checked. This places the container header in the beginning of the file. It will make the video start faster if streaming.
Under the video tab:
- Video Codec: H.264 (x.264). This codes into MPEG-4 part 10, also known as H.264/AVC. It gives much better quality and lower file sizes than the normal MPEG-4 / VP3 encoders and all modern devices like I want to use will support this format. (iPhone, iPad, BluRay Players, PS3, XBox360, etc....)
Framerate: Same as source. I want to keep the video quality as close to the original as possible. As such I keep the same frame rate as per the original one.
Variable framerate: ticked. I keep this as to imitate the original.
Video quality: Average bitrate. Here there is no preview available to see how the video comes out in terms of quality or size, be it using constant quality or average bitrate option. As my main limitation is size, if I wanted to use the constant quality option I would need to try a number on the scale, compress, see file size, try another number and compress again. So for a specific size, I use average bitrate.
2-pass encoding: ticked. Takes longer (almost double the time), but results are worth it.
Mediacalc:
MediaCalc

We will just use the first Calculation part of the application. We fill in:
- Media size: 1Gb. This is the final size we want.
- Video Duration: 41.57. Here we put the exact size of our original video that we jotted down from handbrake as per above.
- Audio bitrate: 160kbps. My original file has this bitrate. The program needs this number as to see what is the total file size of audio+video. The more space occupied by audio, the less we have for video.
- Overhead: 2% this is how much space is used by the mp4 container. I haven't found the exact number, but 2% seems to keep the file close to what I intend it to be.
The number that appears under Video Datarate is the one you want to use in handbrake (3135.981 Kbps). Make sure you have the result in Kbps.

Back to handbrake. After setting the Average bitrate, we get into the H.264 codec options. Here we can make a huge difference on the end result in terms of look&feel of the video. Of course there is a trade off: the better looking the video the more time is needed to encode it, and a better processor needed to decode it. For example an iPad 1 will struggle to decode the video with the settings I will use here.
Handbrake x264 options
Use x264 Advanced Options Panel: unchecked as we will use this more basic interface
X264 Preset: Very Slow. Here the options on the scale go from Ultra fast to placebo. Ultra fast as the name indicates is a extremely quick encoder, but at the cost of video quality. For example same colors tend to be blocks vs. HD resolution. This is the setting I find affects video quality the most, the slower you encode the better the end result will be. Placebo speed is overkill, giving only slightly better results than very slow at a extreme time cost.
X264 Tune: Film. Select the type that is closest to the content you are encoding. Possibilities are:
Handbrake x264 tune
  • Film: Filmed footage (I.e. Real life movie) footage, not Cartoons or Anime. If in doubt, use this one by default.
  • Animation: Use for hand-drawn animated content.
  • Grain: Use for very grainy or old content.
  • Still Image: Use for Photo slideshows or presentations where there is very little moving content.
  • Psnr/sslm: used for testing. Do not use.
  • Zerolatency: Optimise for faster decoding, Useful for low power devices that struggle to decode the video like ipad 1.
  • Fast decode: uncheck
H.264 Profile: High. There are 4 options here:
handbrake H.264 profile
  • Auto: will automatically set the profile based on all the options that have been selected.
  • Baseline: Baseline is the most basic form of encoding. While decoding is much easier, it may also require much higher bit-rates to maintain the same level of quality.
  • Main: The middle ground. Most modern / current devices will support this profile.
  • High Profile: For best quality and filesize at the expense of CPU time in both decode and encode.
If after encoding the video stutters on the playback device, try lowering this from high profile to main or baseline.
H.264 Level: 4.0. This has to do with frame rate and resolution. Leave with handbrake default.
Change to the Audio tab in handbrake:
Handbrake audio tab
As I don't want to re-encode the audio for this video we choose "Audio Passthru" from the drop down list.

Go back to video and check that everything is OK.
Handbrake encode check
If yes, press add to queue. If you want to encode more than one file, repeat the process after selecting source for the next file. When you have everything in the queue, press start. Leave the computer for a couple hours to encode... And voila!!!!! Compressed movie done!

Friday, April 11, 2014

Synology tip: How to find duplicate files or large files automatically

I love my Synology, as I use it for many things and it just works. From media server, to file archive, to backup, to photo server, to surveillance... It has many possibilities. If you add high capacity drives (I have 2 x 3 TB), it can hold quite a lot of information.

Lately I've been centralizing all digital information on the Synology, mainly because I used to have info on multiple computers, external hard drives, backups of backups, etc... and wanted to have everything in one place. After copying and organizing a bit, I found out that I had multiple copies of same files, pictures, videos, etc...

But how to check and erase only duplicates?


I started by using Gemini, a duplicate finding software for MacOS. However the search needs to be done via network (executed on the Mac) and takes forever to generate a report. Wouldn't it be great if Synology could do this without a computer involved?

Luckily, Synology thought of a way to do this automatically by the DSM. Not only that but it can automatically generate duplicate reports on a regular basis and email them to you. The email contains a link which takes you to a webpage where you can delete the duplicate file. EASY!

How to set it up:

Enter your Synology via the desktop DSM ( or simply put login to your Synology ). If you have DSM 5, you should see something like this:

Synology DSM 5 main screen
Charlietechlife.blogspot.com

Open the control panel and under "System" go to "Info center"

Information on your Synology product will appear. On the top there is a tab named "Report". Click on it

Press "Create" to start the report wizard

In the next screen give a identifiable name to your report. I called mine "Duplicates". Also add an email so that your Synology can email you a direct link when the report is ready.
 

After pressing next, the screen will contain several options. Check Only "Duplicate File Candidates" and press next.


The next screen is about scheduling, when do you want Synology to generate the report. I have it once per week every Monday at 00:00. To note this is when it starts generating the report, not when it finishes or sends you the email. In the case you want to verify duplicated (next screen), and depending on the quantity of files you have it make take a while.

After pressing next, you can check "Find confirmed duplicates", which makes 100% sure the files shown are duplicates. I definitely recommend this option. Here you can also choose to check every files in the Synology or only specific folders.

In the next screen verify your options and press "Apply". And there it is! After a some time you will get your first duplicate report.


And within it you can erase the files you don't want to keep!


Thursday, April 10, 2014

How to delete or show only archived emails in Gmail


Apparently over the years I didn't configure some of my devices correctly to interact with gmail. If I blame Blackberry, Outlook, Mac Mail, Gmail app for blackberry, IOS 4, IOS 5, the iPhone 3GS, the iPad 1, iPad Air, iPhone 4s or iPhone 5s, I don't know.
(Mental note.. way too many gadgets passed through my hands!)

Why do I think incorrectly? Because instead of deleted emails like I wanted to when I trash them, some of these apps / devices (not sure which ones) would archive them. Meaning they are still occupying space in gmail and are searchable. Google seems to like that you never erase anything and it is the default behaviour in most interfaces with their mail system.

The issue? There seems to be no easy way of finding this archive and deleting it. Gmails' archive is simply an email with no labels. A label is how gmail classifies email into virtual folders. How to see if you have the same issue?

On the left of the gmail web interface you have a list of all your labels ( Inbox, Sent mail, Drafts, etc... ). Scroll down until you see "All mail"

Gmail all mail

After pressing, you should see a list of emails and next to the subject the label they belong to (Inbox, etc..). If you see no label as the email "es espectacular" below.... It's because it is archived and occupying space.

Gmail all mail


However gmail doesn't have a way of filtering these archived messages as to delete them. To do so, enter in the gmail search box ( on the top ) the following filter search:

has:nouserlabels -in:Inbox -in:Sent -in:Draft -in:Chat

A list of archived messages should appear and you can erase all of them. Double check none has a label before erasing....